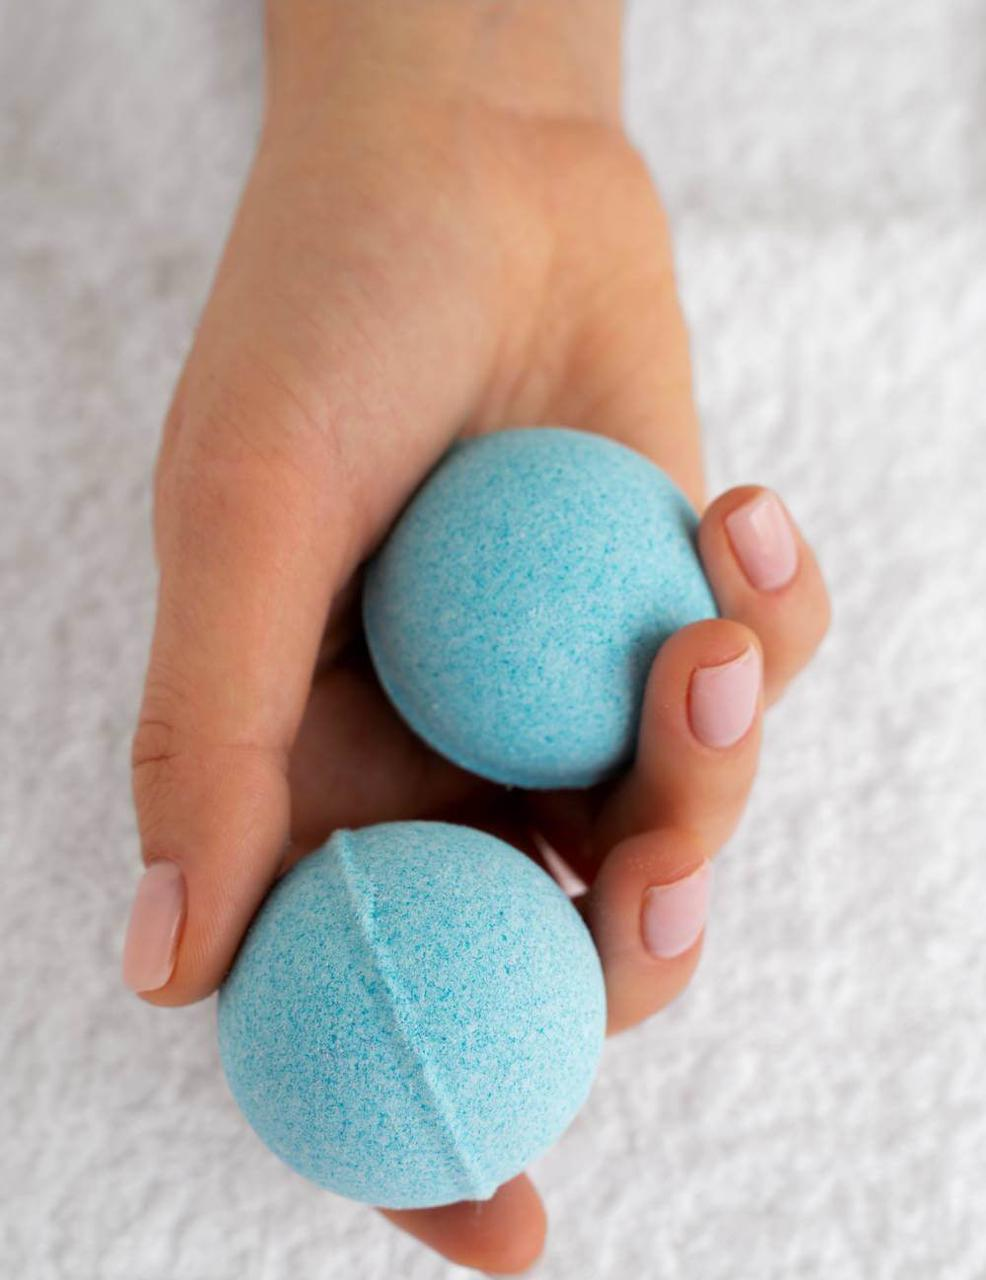
Welcome to this foolproof tutorial for creating your very own homemade bath bombs! I’ve been having a blast “testing” these out at home, and I can’t wait to share the process with you.
I’m even considering hosting a make-your-own bath bombs party with some friends. An added bonus? The delightful aroma that fills your entire room while you make these is simply amazing!
I initially attempted to make bath bombs around Valentine’s Day, but I ran into some trouble with a couple of different tutorials that didn’t yield great results. One of them was particularly frustrating—it completely stuck to the molds, and I had to chip it out with a fork to start over. What a bummer! But hey, if at first you don’t succeed, sometimes you just have to try again. My initial attempts were based on a basic bath bomb recipe, which helped me understand the process better.
On what I had already decided would be my final attempt, I decided to try a different tutorial. I adjusted the amounts based on how many bath bombs I wanted to make, and guess what? It worked! I’m thrilled to share my success with you, along with a few additional tips if you plan to make these yourself. Check them out below!
What are Bath Bombs and Why Make Them at Home?

Bath bombs are a delightful addition to any bath, transforming an ordinary soak into a luxurious, spa-like experience. These fizzy wonders are packed with soothing and moisturizing ingredients that are great for your skin. While store-bought bath bombs can be quite pricey and often contain artificial fragrances and dyes, making your own bath bombs at home offers a fantastic alternative.
By crafting homemade bath bombs, you have complete control over the ingredients, ensuring they are natural and safe to use. You can customize them with your favorite essential oils and colors and even add special touches like dried flowers or glitter. Plus, the process of making bath bombs is a fun and creative activity that you can enjoy solo or with friends and family.
Not only do homemade bath bombs make for a relaxing bath, but they also make wonderful gifts. Imagine the joy on your loved ones’ faces when they receive a beautifully crafted, personalized bath bomb made just for them. So, why not give it a try and start making your own bath bombs today?
Homemade Bath Bombs Recipe
This simple bath bomb recipe makes two delightful homemade bath bombs (you can easily double or triple it if you want to make more!).
Ingredients
Bath bomb molds
4 ounces baking soda
2 ounces cornstarch
2 ounces citric acid
2 ounces Epsom salt
1 to 1 1/2 teaspoons of water
5-10 drops essential oil of your choice
1 1/4 teaspoons of oil (I prefer coconut or olive oil)
1-2 drops food coloring (optional)
Instructions
Combine Dry Ingredients: In a bowl, mix together the dry ingredients (the first four listed above). Use a whisk to remove any clumps, as cornstarch tends to be clumpy.
Mix Wet Ingredients: In a small glass jar, stir together the wet ingredients (the last four ingredients listed). If you’re using coconut oil, give it a quick melt in the microwave or on the stovetop so it will easily combine with the other ingredients.
Combine Mixtures: Slowly pour the liquid mixture into the dry mixture while whisking continuously. Be cautious—if you see the mixture fizz or foam, you may be adding the liquid too quickly.
Check Consistency: Once the wet and dry ingredients are well combined, take a small amount in your hand and squeeze it together. It should stick together fairly well in one or two big chunks. If it crumbles, you may need to add a tiny bit more water, but be careful not to add too much.
Now you’re ready to mold your bath bombs!
Safety Precautions and Considerations
When diving into the world of DIY bath bombs, it’s essential to prioritize safety. Handling ingredients like citric acid requires some precautions to ensure a safe and enjoyable experience. Always wear gloves and protective eyewear to protect your skin and eyes from any potential irritation. Working in a well-ventilated area is also crucial to avoid inhaling any fine powders.
If you notice any skin irritation or allergic reactions while making or using your bath bombs, it’s best to discontinue use immediately and consult a doctor. Remember, everyone’s skin is different, and what works for one person may not work for another.
Another important consideration is the slipperiness of bath bombs. They can make your bathtub quite slick, so be cautious when getting in and out to avoid any slips or falls. By taking these simple safety measures, you can enjoy the process of making bath bombs without any worries.
Troubleshooting Your Bath Bomb Mixture
What If the Mixture is Too Powdery?
If your mixture is still too powdery to hold together, don’t worry! Simply add a tiny bit more water and mix until it holds together better. If you find that adding the liquid slowly is challenging, consider using a spray bottle to mist the mixture instead of pouring. This method allows for more control and helps prevent the mixture from fizzing too much.
Molding Your Bath Bombs
Fill the Mold: Next, fill half of your bath bomb mold with the mixture until it’s just slightly overflowing. This ensures that when you press the two halves together, they will fit snugly.
Press Together: Firmly press the two halves of the mold together. This step is crucial for ensuring that your bath bomb holds its shape.
Remove One Side: Gently remove one side of the mold. Be careful during this step to avoid breaking the bath bomb.
Drying: Place the bath bomb on a tray and allow it to dry out completely before removing the other side of the mold. This drying time is essential for the bath bomb to maintain its shape and ensure it’s ready for use.
Once your bath bombs are fully dry, they’ll be ready to enjoy a relaxing bath!
How Long to Wait Before Removing the Bath Bomb from the Mold?
Timing is Key: After you’ve filled your bath bomb molds, it’s essential to wait about one hour before attempting to remove the bath bomb. This waiting period allows the mixture to set and harden slightly, making it easier to remove without breaking. This step is crucial in any bomb recipe, ensuring the bath bombs maintain their shape and integrity.
Check for Readiness: After an hour, gently test the bath bomb to see if it releases from the mold without breaking. If it feels too soft or crumbles, don’t worry! Simply press the mixture back into the mold and let it dry for a bit longer.
The Importance of Drying: The goal is to get the bath bomb out of the mold so it can continue to dry out overnight. I’ve found that if you leave them in the mold for too long, they can start to stick, making it more difficult to remove them without cracking.
Finding the Balance: It’s all about finding the right balance. If something cracks at this point, it’s totally fine to just press the mixture back into the mold. No need to stress! Bath bombs are quite forgiving, and a little extra time in the mold can help them firm up.
Removing the Other Side
Once you’re ready to remove the other side, gently invert the bath bomb so the uncovered side is facing down. Then, carefully remove the other half of the mold from the top.Caution: These bath bombs can fall apart easily if you’re not careful, so take your time during this step to ensure they stay intact. If you notice any cracks or breaks, don’t panic! Press the mixture back together and allow it to dry a bit longer.
Additional Tips for Success
Humidity Matters: Keep in mind that humidity can affect how well your bath bombs hold together. If you’re in a particularly humid environment, you may need to adjust the amount of water you use. Less water can help prevent the mixture from becoming too wet and sticky.
Experiment with Scents and Colors: Feel free to get creative with your bath bombs! Experiment with different essential oils and colors to create unique scents and vibrant hues. Just remember that a little goes a long way with both essential oils and food coloring.
Storage: Once your bath bombs are fully dry, store them in an airtight container to keep them fresh. This will help preserve their scent and prevent them from absorbing moisture from the air.
Gift Ideas: Homemade bath bombs make fantastic gifts! Consider wrapping them in cellophane or placing them in decorative boxes for a thoughtful present. You can even customize the scents and colors based on the recipient’s preferences.
Enjoying Your Bath Bombs: When you’re ready to use your bath bombs, simply drop one into a warm bath and watch it fizz and dissolve, releasing delightful scents and skin-nourishing ingredients. It’s a perfect way to unwind after a long day!
What Do I Do If the Bath Bomb Cracks?
If a bath bomb cracks in half while you’re removing it from the mold, don’t worry! This is a common occurrence, and there are a couple of easy fixes:
Press It Back Together: Gently press the cracked half back on top of the other half. This can often hold the bath bomb together well enough for it to dry properly.
Start Over: If the bath bomb is too broken to salvage, you can remove all the mixture back into the mixing bowl and start the molding process again. This is a great opportunity to revisit your diy bath bomb recipe, ensuring proper mixing to achieve the desired fizz effect. It’s a bit of extra work, but it’s better than ending up with a bath bomb that won’t hold together.
I’ve had this happen to a few of my bath bombs, so don’t fret—it’s easy to fix!
Drying and Storing Your Bath Bombs
Once your bath bombs are completely out of the mold, allow them to dry out for about 8 hours or overnight. This drying time is crucial for ensuring they maintain their shape and don’t crumble when you use them.
After they are very dry, you can wrap them in plastic wrap and store them in a dry place until you’re ready to use them. They also make fantastic gifts, so consider sharing your creations with friends and family!
Maximizing Fizz and Benefits in Your Bath Bomb
To achieve that satisfying fizz and maximize the benefits of your bath bomb, it’s all about using the right ingredients and following the recipe closely. Citric acid is the star player when it comes to creating that iconic fizz, so be sure to measure it accurately. Baking soda is another essential ingredient that works in tandem with citric acid to produce the fizzing reaction.
Incorporating carrier oils like sweet almond oil not only helps bind the ingredients together but also adds nourishing properties to your bath bomb. Essential oils are a fantastic addition to their therapeutic benefits and delightful fragrances. Whether you prefer the calming scent of lavender or the invigorating aroma of peppermint, there’s an essential oil for every mood.
Don’t be afraid to experiment with different ingredients and recipes to find the perfect combination for your skin type and preferences. With a bit of practice, you’ll be crafting bath bombs that fizz beautifully and leave your skin feeling soft and pampered.
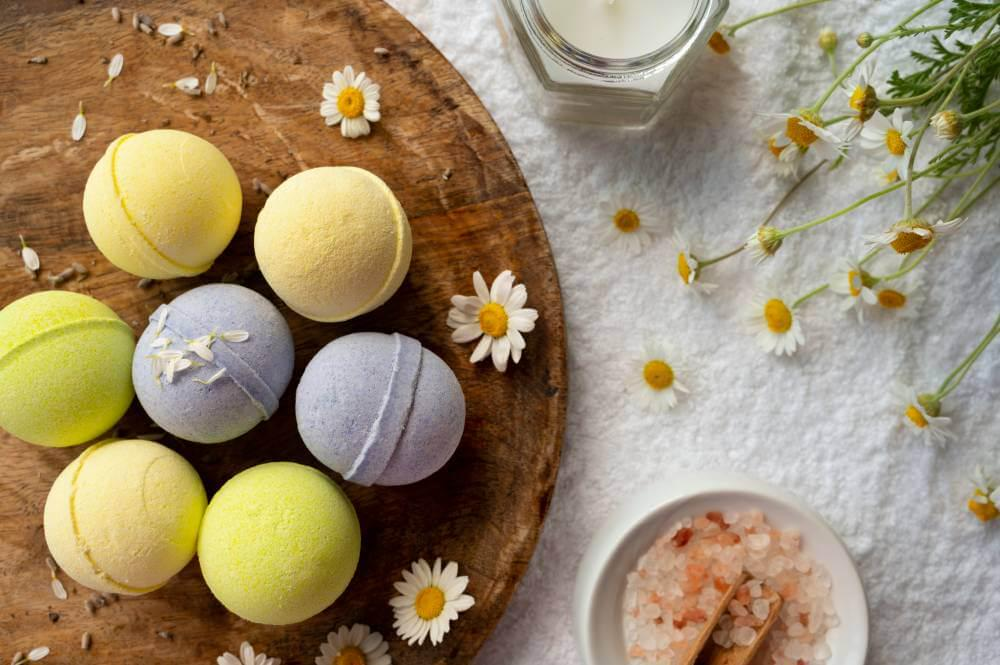
Flavor and Scent Combinations
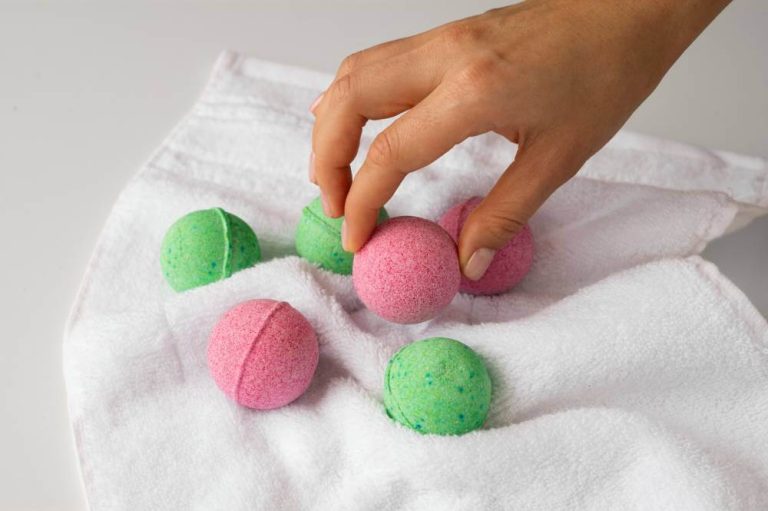
In case you’re curious, here are some of the delightful scents I created during my bath bomb-making sessions:
Lemongrass (green)
Lavender (purple)
Peppermint (white and red)
You can mix essential oils into each bath bomb to customize the scent to your liking. The possibilities are endless!
Using Citrus Essential Oils
I’ve had some people ask about using citrus essential oils, as they can sometimes cause photosensitivity. In my experience, citrus oils are generally fine to use in bath bombs since you will be washing them off your skin in the bath and not leaving them on before going out into the sun.
That being said, if you’re new to essential oils, it’s always a good idea to test out different scents to find what you prefer and what works best for your skin.
Be Mindful of Allergies and Sensitivities
We are all different, and it’s possible that some allergies or sensitivities may occur. Always be aware of how your skin reacts to certain ingredients and use what is best for you. If you have sensitive skin or known allergies, consider doing a patch test with any new essential oils before incorporating them into your bath bombs.
What Else Can I Add to My Bath Bombs?
There are plenty of fun and creative additions you can incorporate into your homemade bath bomb recipe to enhance their beauty and effectiveness. Here are some ideas:
Dried Flower Buds
You can easily add dried flower buds, such as lavender buds, to your bath bombs. They not only look beautiful but also add a lovely scent to your bath. Just remember to use food-grade dried flowers to avoid any that might have been grown with pesticides. You definitely don’t want to soak in a bath with those!
Note: Keep in mind that after using a bath bomb with dried petals, you will need to remove these from your tub. While they can add a nice touch, they may create a bit of a mess, so be prepared for some cleanup afterward.
Creating Two-Tone Bath Bombs
If you want to create visually striking two-tone bath bombs, like my peppermint ones, it’s simple! Just mix up your batter in two separate bowls and only add food coloring to one of them. Then, layer the two mixtures in your molds for a beautiful effect. This technique allows for endless customization and creativity!
Seasonal Shaped Molds
Customize your DIY bath bombs for different seasons by using shaped molds! This is a fun way to make your bath bombs more festive, whether for personal use or as gifts. You can add different color fillings or even use a little bit of watered-down food dye to paint onto the finished bath bombs for added flair.
Halloween Molds:
Ouija Board: Perfect for a spooky bath experience!
Candy Corn: Fun and festive for Halloween.
Pumpkin King: A whimsical addition to your Halloween decor.
Christmas Molds:
Gingerbread Man: Adorable and festive for the holiday season.
Peppermint Candy: A classic holiday treat turned bath bomb!
Snowflake: Beautiful and seasonal, perfect for winter baths.
Essential Oils and Fragrance Blends
In addition to the essential oils you may already be using, consider experimenting with different fragrance blends. Mixing scents can create unique and delightful aromas. For example, combining eucalyptus and mint can create a refreshing and invigorating bath experience, while lavender and chamomile can promote relaxation.
Oatmeal and Honey
For a soothing and skin-nourishing bath bomb, consider adding finely ground oatmeal and a bit of honey. Oatmeal is known for its skin-soothing properties, making it great for sensitive skin, while honey adds moisture and a touch of sweetness.
Coconut Milk Powder
Adding coconut milk powder to your bath bombs can create a luxurious, creamy bath experience. It helps to moisturize the skin and leaves it feeling soft and smooth.
Gifting and Sharing Your Homemade Bath Bombs
Homemade bath bombs are not just a treat for yourself—they make fantastic gifts for friends and family, too! You can customize them with different colors, scents, and patterns to match the recipient’s preferences, making each gift truly special. Consider packaging your bath bombs in cute paper gift bags or decorative boxes for a thoughtful and personalized touch.
If you’re feeling entrepreneurial, you might even consider selling your homemade bath bombs. Just be sure to follow local regulations and guidelines to ensure your products are safe and compliant. Another fun idea is to host a DIY bath bomb-making party or workshop. It’s a creative and enjoyable way to spend time with loved ones while making something useful and relaxing.
Whether you’re giving them as gifts or sharing the experience of making them, homemade bath bombs are a wonderful way to spread joy and relaxation. So, gather your ingredients, get creative, and start sharing the fizzy fun!